Repeated use of automatically generated interfaces. Redefining components in no time
This multi-purpose method gets you to know the twists and turns of working with DVelum designer, reveals the project code structure and helps you to go through the customization of system components and editing a link to the list of objects (the most frequently asked question on the forum).
Lets have a look at the following task:
- there is a client, who has paid several visits to a company’s office;
- he or she leaves some important information to be processed by an operator (in our case, it is just some text);
- one of the system administrators is in charge of processing the data collected during the visit.
We need to design an interface so as to add and attach a visit directly from the client’s management interface. The Client object will contain the link to the Visit object list.
The example is slightly unreal, however, it is quite interesting from the point of view of reviewing the platform functionality.
We will be trying to create a peculiar interface as such behaviour is not mentioned in the code auto generator.
There are two ways to go:
- to create the interface manually by describing it in the Layout Designer and creating a controller;
- to improve the code created by the code auto generator.
The first solution is more or less clear, while the second one is not that evident. That’s why, we will examine it in more detail.
Let’s start with developing the data structure and creating two ORM objects:
Visit:
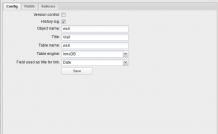 |
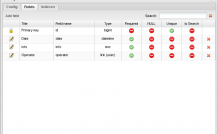 |
The object includes the following fields:
- date - the date of visit (datetime);
- info - the text of the message (text);
- operator - the operator in charge of processing the message (link to the User object).
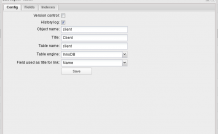
Client:
 |
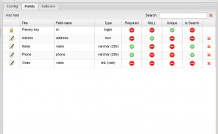 |
The object includes the following fields:
- address (text);
- name (varchar 255);
- phone (varchar 255);
- visits - the list of visits (a link to the list Visit objects).
Go to the administrative module management interface and generate management interfaces for both the objects. We will not go deeper into the procedure as it is described in the screencast and other case studies.
Upon creating the modules, we have two ready to use interfaces for managing visit and client data. Now, we need the Visits tab of the Edit Client interface to open Add New Visit window instead of the list of visits to select. Once saved, the visit should be added to the client’s list.
Layout Designer is made in such a way that all components used in the project by default constitute two name spaces:
- appRun - for common interface elements like grid, store, panel;
- appClasses - for component descendants like EditWindow.
Thus, appRun stores already initialized widgets, while appClasses contains descriptions of the objects created by means of Ext.create() method.
The interface project can be split into two parts:
- visual representation (the hierarchy of interface elements), which is the dynamic part of the project. Its code is generated anew automatically every time the project structure is changed and is recorded into a separate cache file.
- business logic (the code in the editor responsible for component interaction and object behavior), which is stored in a separate file in the js/app/actions/[projectname].js directory. It may be edited by means of the built-in code editor, as well as any other editor. If you are going to change the code in a third party editor, make sure you update the Layout Designer window as off-site code alterations are not traced at this stage.
So, we have two interface projects with the same automatically generated namespace. We need to connect the “Visit” editor project to the “Client” editor project to be able to use the ready-to-use solution created by the system.
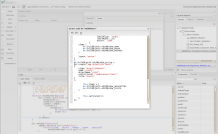
To ensure the correct cooperation of the projects, the namespace of one of them needs to be changed to prevent their overlapping. Go to Layout Designer and open the “Visit” project.
1. Hide History Panel, which shows in the Edit window: specify hideEastPanel: true in the editWindow properties;
2. Comment out the code in the Layout editor (it is not obligatory, but it will help to avoid a js-error when changing the namespace);
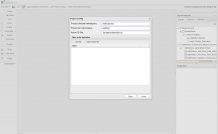
3. Go to project settings and change namespaces accordingly:
- appClasses to visitClasses;
- appRun to visitRun.
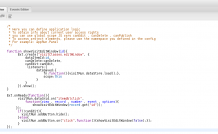
4. In code editor rename showEditWindow function to showVisitWindow, find this function invocation code and rename it as well. Change the namespaces in the code: appRun to visitRun. Now, as we have changed the project namespace, update the code accordingly.
Uncomment the code (if it has not been done earlier, at step 3).
Use Ctrl + s hotkeys to save changes in the code editor (focus on the editor required).
Once the code changes are saved, save the project and click the Update button to refresh the Layout Designer window (you might want to refresh it a few times to clear your browser’s cache). At this point, “Visit” interface adaptation is completed. Next time, it will take you not more than a couple of minutes.
“Client” Interface Customization
First and foremost, hide the History panel: editWindow->hideEastPanel:true.
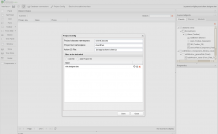
Now, connect the Edit “Visit” interface. Open project settings, click Add Project File and find visit.designer.dat
At this stage, Edit Visit window is available inside the Edit Client interface, as if it has been defined in the project. The Editor namespaces do not overlap, so “Visit” elements may be invoked in this project. Even though “Visit” elements do not show in the interface, we know that they are there.
Visits tab of the Edit Client window displays the app.objectLink.Panel system panel.
System components have a monolithic structure and can not be divided into elements in the project tree.
Improving system component logic might puzzle a new user and is by no means the best solution as component elements can no longer be managed from within the Visual Interface. Nevertheless, the situation might well arise.
Using Investigation Approach
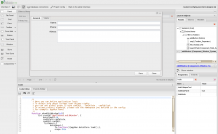
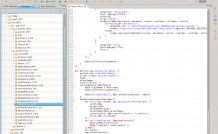
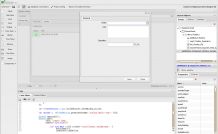
Open View Code of the editWindow by clicking [JS]:
Run through the code and reveal the specific nature of the Layout components’ structure.
Objects defined in appClasses contain the me.childObjects object container with links to embedded elements, which makes it easy to call them.
Thus, using the following pattern we can easily get a link to the system object, which is the Editor of related “Visits””:
var win = Ext.create("appClasses.editWindow", {});
var relatedVisits =
 win.childObjects.editWindow_visits;
It is now clear that the Editor is in fact app.objectLink.Panel with some additional settings.
Find the ObjectLink.js file and review the panel implementation:
Being an add-on of the app.relatedGridPanel component, it provides “Add element” click handler and opens the Editor window.
This functionality is not useful and may be removed. It is clear from the code that app.objectLink.Panel lacks this button description. It means that the button is defined on a higher abstraction level, inside the app.relatedGridPanel component.
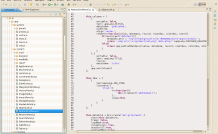
Open the source code of the app.relatedGridPanel component:
The app.relatedGridPanel is extended from Ext.Panel and contains toptoolbar with the Add Element button initializing the addItemCall event.
Replace this button with a custom one opening the “Visit” Editor.
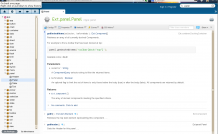
We still have to find out how to get the link to the panel toolbar. For this purpose, open ExtJS documentation to see that Ext.Panel uses getDockedItems method, which returns an array of toolbar components.
Currently, we have an Editor component extended from app.relatedGridPanel, which actually is a panel with a toolbar, a storage and a grid.
We need:
- to redefine the toolbar button so that it would call “Visit” editor on click;
- upon changing a visit record, to add the record to the relatedGridPanel by simply inserting the record to the storage.
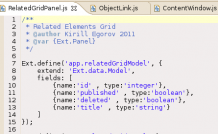
Find description of the record structure for the related items storage in the beginning of the app.relatedGridPanel source file:
The structure is pretty simple:
- id - record id;
- title - record title;
- deleted - a boolean variable used to delete an item (false in our case as the record is not deleted);
- published - a boolean variable used to publish an item (true in our case as the record is published).
Now, it is time to customize the source code of the “Client” interface.
Customizing Client Management Interface
Open source editor and update the showEditWindow function responsible for displaying the Editor window:
function showEditWindow(id){
    /**
      *  Create “Visit” Editor window object
      *  win variable keeps link to the object
      */
    var win = Ext.create("appClasses.editWindow", {
       dataItemId:id,
       canDelete:canDelete,
       canEdit:canEdit,
       listeners:{
          dataSaved:{
             fn:function(){appRun.dataStore.load();},
	     scope:this
          }
       }
    });
    /**
      * Get the link to the related “Visits” editor
      */
    var relatedVisits = win.childObjects.editWindow_visits;
       /**
         * Get the link to top toolbar, which is the only one and hence the first
         * in the array of components returned by the panel.getDockedItems() method
         */
    var docked = relatedVisits.getDockedItems('toolbar[dock="top"]')[0];
    /**
      * Clear toolbar (Remove the button selecting related items)
      */
    docked.removeAll();
    /**
      * Place your own button to the toolbar. On click, the button
      * opens “Visit” editor from the embedded Layout editor subproject
      *  (it was connected at the initial stage of this case study)
      */
    docked.add({
        text:'Create Item',
        handler:function(){
           /**
             * The “Visit” editor project is included into the current one
             * so that its components can be initialized
             * using the respective namespace
             */

           var visitWin = Ext.create("visitClasses.editWindow", {
              // new record id is 0, which means that
              dataItemId:0
              // is not defined, nothing is left to do, but to use the current
              // user access permissions
              canDelete:canDelete,
              canEdit:canEdit
           });
           /**
             * Add “Visit” editor event handler
             * - dataSaved
             */
           visitWin.on('dataSaved' , function(){
              // get link to the form with data
              var visitForm = visitWin.editForm.getForm();
              //  get object title value
              // in our case, the title is the visit date
              var visitDate = visitForm.findField('date').getValue();
              // create a record to be added to
              // the related visits Editor
              var record = Ext.create('app.relatedGridModel', {
                 // get to know the new object id from the form:
                 id visitForm.findField('id').getValue(),
                 // set date format
                 title:Ext.Date.format(visitDate, 'd.m.Y H:i'),
                 deleted:0,
                 published:1
              });
              // add the record to the storage
              // of the related visits Editor
              relatedVisits.getStore().insert(0 , record);
              // close “Visit” editor
              visitWin.hide();
           });
           // Show “Visit” editor window
           visitWin.show();
        }
     });
     // Show “Client” editor window
     win.show();
}
To make it easier to grasp the idea, we provided the instructions in a straight-line code sequence.
The interface is ready to use.
The given example is more of a demo of Layout Designer opportunities and operation specifics.
System components have been designed for quick generation of simple data management interfaces. If your application logic presupposes something more than a table or a form, you should speculate on developing an interface without using the autogeneration system.
We highly recommend to avoid redefining system object behavior as it makes interface configuration less flexible. However, it might save you time when working on a prototype.
Further on, you might want to add something else to the system component. It is a little bit easier to manage an interface manually created in the manager as it is easier to set up, all embedded items show in the tree, the whole working process is more transparent and there is no need to dig in the source code.
