Quick Start: Creating the "News" Module
Let’s see the system may help you to create a simple module on your own (without using scaffolding).
We’ll take the ‘News’ module as an example, but approach it in a slightly different way to demonstrate more system components.
DEVELOPMENT OF THE ADMINISTRATIVE INTERFACE
CREATING AN ORM OBJECT RESPONSIBLE FOR ARCHIVING NEWS/KEEPING TRACK OF NEWS FEEDS
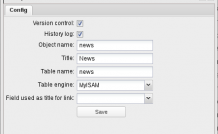
Go to ORM section of the Data Objects menu and click Add Object. Fill in the fields of the form:
- Version control - a checkbox defining whether to use documents version control or not;
- History log - a checkbox for enabling or disabling object logging;
- Object name - the name of the object, which may contain alphabetic, numeric characters and underscore «_»;
- Title - the title or the object name for showing in user interfaces;
- Table name - database table name (a system prefix will be added automatically);
- Table engine - database repository type (in case of InnoDb, ORM will use transactions when dealing with objects, but it is not necessary under our conditions);
- Field used as title for link – a field used as the object link title, currently there are no such fields, so it should remain empty.
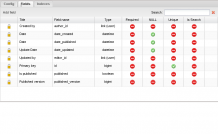
Clicking the ‘Save’ button will create an ORM object with a number of system fields. Some new tabs become active:
Each object contains the system field ID - unsigned integer autoincrement (object identificator).
Objects under revision control contain additional system fields:
- author_id - the identifier of the user who has created the record;
- date_created - the date the record was created;
- date_published - the date the record was published;
- editor_id - the identifier of the user who last updated the document;
- published - states whether the document is published or not;
- published_version - the published version of the document.
Now add fields for the News object. To do this, click Add Field in the ‘Fields’ tab. The following fields will be added:
- news_date - the date of the news item (datetime);
- title - the title of the news item (varchar 255);
- text - the text of the news item (long text + allow html).
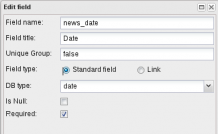
The interface for adding a new field into an object is shown below:
The form contains the following fields:
- Field name - the field name in the database (permitted characters: alphanum + _);
- Field title - the name of the field in the interface;
- Unique Group - the name of the uniqie fields group (there may be a unique ORM address for one as well as for many fields, just mention one if needed);
- Field Type - the type of field;
- Standart field - a standard database field;
- Link - a link to the object; a multilink or a link to the dictionary definition (a list, also defined in the ORM section);
- IsNull - defined whether the field value may equal to null;
- Required - the field is required.
Depending on a field chosen, there may show up additional settings, e.g.:
- isSearch - the field may be used for inline search;
- Allow HTML - the checkbox allowing to keep HTML code.
The ‘Indexed’ tab allows to create database table indexes, however, it won’t be observed for our case.
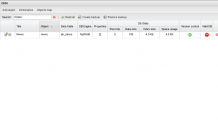
As soon as all fields have been added, go to the object management main interface:
The Valid DB brick sign signifies that the ORM object structure has not been synchronized with the database structure. The status may be changed by clicking the gear-shaped button in the first table column. Now, the database is synchronized with the new object structure.
CREATING ADMIN INTERFACE
The task be divided into two smaller ones: creating a controller and creating an interface project. Interface are created by means of ExtJs 4 library. For more details on objects and properties go to the developers’ official web-page: www.sencha.com.
Enter the ‘Layout Designer’ section and create a new project titled ‘News’ in the root directory of the projects’ storage (interface menu - new):
Now we’ll create Data Store, Data Grid и Edit Window.
To generate a news list, we will need a controller returning information. Create it by adding ‘News’ directory to the catalogue www/dvelum/www/system/app/Backend/, where we’ll create the Controller.php file, the final path being www/dvelum/www/system/app/Backend/News/Controller.php.
The file will contain the class controller inherited from the system controller supporting versions control:
class Backend_News_Controller extends Backend_Controller_Crud_Vc.
In our case there is no need changing controller logic, so we’ll just define the rest of the fields to be displayed in the interface:
<?php

class Backend_News_Controller extends Backend_Controller_Crud_Vc
{

    protected $_listFields = array("id","title","news_date","published","published_version","date_created","date_updated");

}
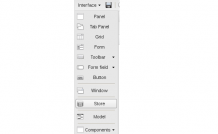
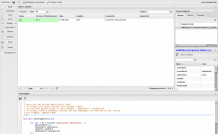
Next, go to Layout Designer and creates a Store object titled ‘dataStore’ by clicking the relevant button on the panel the components list:
In the same way, create Store object for the years list used for filtering the content (more on this later on) and give it the name ‘yearStore’.
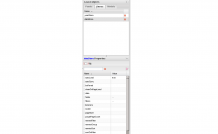
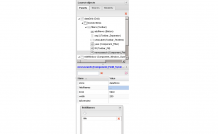
Open the ‘Store’ tab in the ‘Layout Objects’ right-hand panel and double-click the newly created dataStore object. The object’s properties panel will show up:
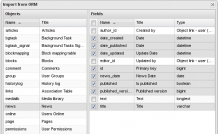
Now, import the fields to Store. Open the storage fields editor double-clicking the ‘1’ button as the image shows. Click the ‘Import from orm’ button, which goes first in the top panel of the opened window).
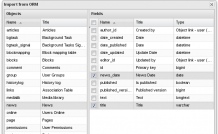
In the left panel of the opened import window find the News object and click it to upload the object’s fields list. Choose fields for import as the image shows and click Select, after that the fields will get imported to the storage:
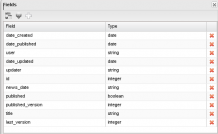
Backend_Controller_Crud_Vc::getList method (our News controller is inherited from it) will return the additional information. Besides the mentioned class fields, it will return the editor, author and last version data. Manually add three more fields: user(string), updater(string), last_version (integer).
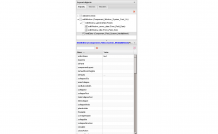
The final fields list should contain:
Close the ‘Edit Store fields’ window and open ‘Edit Store Proxy’ window (number 2 button to the right of the ‘Edit fields’ button).
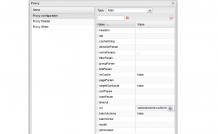
Start setting up Store by opening ‘Proxy configuration’ section and choosing the Ajax type of proxy.
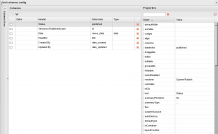
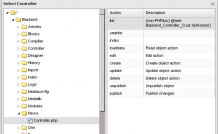
In the properties panel click ‘Edit url settings’ and choose News list in the ‘Choose controller and action’ window as the image shows. If you are using phpDoc comments and have disabled opcode-cacher, you will see comments next to the controller methods list:
 |
 |
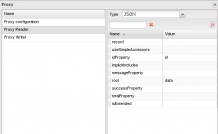
Next, select JSON type in the Proxy Reader secton and the following settings in the ‘Properties’ panel: idProperty = id, root = data:
You have finished editing Proxy. Set the ‘autoLoad’ parameter for dataStore to ‘true’: autoLoad = true.
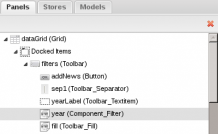
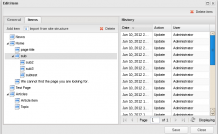
Create the components hierarchy as shown below (drag and drop elements in the tree if needed):
To do so, click ‘Grid’ on the components list panel and name it dataGrid.
In the dataGrid properties set ‘store’ to ‘dataStore’.
Next, choose Docked Items under dataGrid and click the components list panel: Toolbar → Panel. Name it ‘Filters’ and add a button named ‘addNews’.
In Advanced options of the dataGrid properties check the Paging box.
Repeat the same for ‘Panel’:
Toolbar -> separator,
Toolbar -> Text Item,
Toolbar-> fill.
Add the grid filter field: Component -> Field -> Search field (we’ll set it up a little bit later).
Give the Component -> Store filter the name ‘year’ and double-click ‘year’ (Component_Filter) to open its Advanced properties under the main properties. Click ‘Change field type’ button and set the field type to ‘ComboBox’.
Herewith, in the Advanced Options tab set the ComboBox properties:
valueField = id
displayField = title
store = yearStore
width = 80
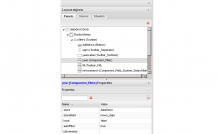
Set the filter properties as shown on the screenshot (the screenshot displays more components, which will be added later):
Set the search field settings as shown below:
We will need a non-standard query. This is why you need to create a real (extended) model for the News object:
www/system/app/Model/News.php
<?php
class Model_News extends Model
{
    /**
     * Retrieve the array for years
     * @return array
     */
    public function getYears($published=false)
    {
        $sql = $this->_db->select()
                         ->distinct()
                         ->from($this->table() , array('year'=>'YEAR(news_date)'))
                         ->order('year DESC');

        if($published){
             $sql->where('`published` = 1');
        }
        return $this->_db->fetchCol($sql);
    }
    /**
     * DVelum 0.8.x only
     * Redefine the add filter method so that the data could be filtered
     * by year (when requested, late static binding is used)
     * @see Model::queryAddFilters()
     */
     static public function queryAddFilters(Zend_Db_Select $sql, $filters)
     {
        if(!is_array($filters) || empty($filters)){
             return;
        }

        $db = Application::getDbConnection();
        foreach ($filters as $k=>$v)
        {
            if(empty($v))
                continue;

            if(is_array($v)){
                $sql->where($db->quoteIdentifier($k) . ' IN(?)', $v);
            }else{
                if($k == 'news_date'){
                    $sql->where(' YEAR(`news_date`)=?', intval($v));
                }else{
                    $sql->where($db->quoteIdentifier($k) . ' =?', $v);
                }
            }
         }
     }
    /**
     * DVelum 0.9.x only
     * (non-PHPdoc)
     * @see Model::queryAddFilters()
     */
    public function queryAddFilters($sql , $filters)
    {
        if(!is_array($filters) || empty($filters))
            return;

        foreach($filters as $k => $v)
        {
            if(empty($v))
                continue;

            if(is_array($v))
            {
                $sql->where($this->_db->quoteIdentifier($k) . ' IN(?)' , $v);
            }
            else
            {
                if($k == 'news_date')
                    $sql->where(' YEAR(`news_date`)=?' , intval($v));
                else
                    $sql->where($this->_db->quoteIdentifier($k) . ' =?' , $v);
            }
        }
    }
}
Create a new method in the News controller to retrieve the array of possible years for news:
    public function yearlistAction()
    {
        //Init the news model
        $model = Model::factory('News');
        //Get the list of years
        $years = $model->getYears();
        $result = array();
        //Build a response in the necessary format
        $result[] = array('id'=>'','title'=>'All');

        if(!empty($years))
            foreach ($years as $k=>$v)
                $result[] = array('id'=>$v,'title'=>$v);

        Response::jsonSuccess($result);
    }
Set yearStore to yearlistAction by analogy with getList for dataStore.
Add two more fields to yearStore: id (number) and title (string), autoLoad: true.
Let’s get down to editing dataGrid columns (‘Properties’ panel, ‘Columns’ button). Import fields from ‘Store’ using the respective button. Give names to columns.
Additionally, define the renderer property for columns:
published → renderer: System/Publish
versions → renderer: System/Versions
date_created → renderer: System/Creator
date_updated → renderer: System/Updater
news_date → format: d.m.Y
It is possible to adjust the columns’ width and change their order by drag and dropping them in the main interface.
In the Layout Designer add editWindow component Crud Vc Window.
Define the following attributes in the window properties:
controllerUrl = /adminarea/news/ (In the controller select window choose ‘News’)
objectName = news (choose from the dropdown list)
Import fields for the form. To do this, click Import From ORM on the window’s ‘Properties’ panel to the left from the Show Window:
Add htmlEditor Component-> field-> WYSIWYG media Field to the window and define its properties as follows:
editorName = text
title = Text
Define title = GENERAL for editWindow_generalTab.
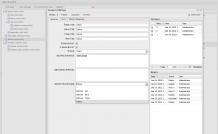
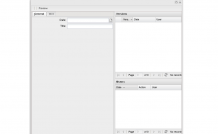
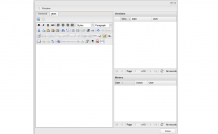
Now, review the window clicking the Show Window button in the editWindow properties panel. See the image below for Your reference:
 |
 |
APPLICATION INTERACTIVE LOGIC
Define the following attributes in the code editor:
//The function for showing the ‘Edit record’ window
//takes the object ID as an argument
function showPageEdit(id){
	var win = Ext.create('appClasses.editWindow', {
                dataItemId:id,
                canDelete:canDelete,
                canEdit:canEdit,
                canPublish:canPublish
        });

        win.on('dataSaved' , function(){
        	appRun.dataStore.load();
        	appRun.yearStore.load();
	}, this);
        win.show();
}

Ext.onReady(function(){

 	/*
	 * itemdblclick event handler for Grid
	 */
	appRun.dataGrid.on('itemdblclick', function(view , record , number , event , options){
		showPageEdit(record.get('id'));
	});

 	/*
 	 * Judging from the access permissions, hide the ‘Add news’ button
 	 * and add a click handler for it
 	 */
	if(!canEdit){
		appRun.addNews.hide();
	}else{
		appRun.addNews.on('click',function(){
			showPageEdit(false);
		});
	}
});
Save the code and the project in the editor. In conclusion, add the news module to backend and set the current project as an interface.
Modules configuration section (modules of the Admin panel).
Click Add element, select a controller in the line, write a title, choose the project we have created in ‘Layout Designer’ as an interface:
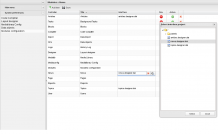
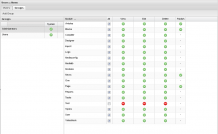
Grant permissions to groups of users in the Groups tab of the Users module:
Reload the page. The module is ready. Though described in so many wordsl, these operations won’t take long to perform.
CREATING USER MODULE BASED ON PAGES TREE
Prior to going in for controller development, create a simple configuration file:
www/system/config/news.php
<?php
return array(
// number of records per page
'num_in_list' => 5
);
Now, create a news controller and define the application logic for it:
www/system/app/Frontend/News/Controller.php
<?php
class Frontend_News_Controller extends Frontend_Controller
{
    /*
     * Redefine the constructor and upload the configuration file
     */
    public function __construct()
    {
        $this->_config = Config::factory(
            Config::File_Array,
            Application::getConfig()->get('configs').'news.php'
        );
        parent::__construct();
    }

    /*
     * Default action
     * A page with the news titles list
     */
    public function indexAction()
    {

       /*
        * Define the requested news list page, which will make the second
        * path parameter, e.g. site.com/news/1.html
        */
       $page = intval(Request::getInstance()->getPart(1));

       if($page < 1)
           $page = 1;
       /*
        * Judging from the number of records per page define
        * what record to start your query with
        */
       $from = ($page-1) * $this->_config->get('num_in_list');
       // Install model for the News object
       $model = Model::factory('News');
       // Fill in the array for query parameters
       $params = array(
           // sorting
          'sort'=>'news_date',
           // direction
           'dir'=>'DESC',
           // start from the line $from
           'start'=>$from,
           // select ‘num_in_list' records
           'limit'=>$this->_config->get('num_in_list')
       );
       // Set filter to the query of the just published objects (materials)
       $filters = array('published'=>true);

       /* Request the model for a query of records
        * judging from the paginator sorting and filter parameters
        * request just three columns: id, title, news_date
        * apply hard caching if possible
        */
       $data = $model->getList(
           $params,
           $filters,
           array('id','title','news_date'),
           true
       );
       /* Request the model for a general number of DB lines (number of objects)
        *  meeting the filtering requirements
        */
       $itemsCount = $model->getCount($filters,false,true);
       // Create a paginator (page-by-page navigation element)
       $pager = new Pager();
       // Pass the current page number to paginator
       $pager->curPage = $page;
       // Set the maximum allowed number of buttons-links
       $pager->numLinks = 5;
       /* Set up hyperlink template
        * after requesting the page address with the connected new controller from the user interface router
        * As an additional parameter, add a template to be changed to the page number  (the template is defined in the pager class, but may be changed to your own)
        */
       pager->pageLinkTpl = Request::url(array($this->_router->findUrl('news') , '[page]'));
       // Set the number of pages for the paginator
       $pager->numPages = ceil($itemsCount / $this->_config->get('num_in_list'));
       // Initialize the template object
       $template = new Template();
       //  Transfer data to the template
       $template->list = $data;
       $template->page = $this->_page;
       $template->pager = $pager;

       // Dvelum 0.9.x set router
       $template->router = $this->_router;

       // Run rendering of the news list template
       $this->_page->text = $template->render($this->_page-> getTemplatePath('news_list.php'));
}

// View the news item
public function itemAction()
{
       // define the page number — 3, and the path, for instance:
       // site.com/news/item/5.html
        $id = intval(Request::getInstance()->getPart(2));
        $vers = Request::get('vers', 'int', false);
        $data = array();

        if($id)
	{

               /* If there is a request for a certain document version preview
                * and the user has administrator rights,
                * we may receive the data on a certain document version
                */
		if($vers && User_Admin::getInstance()->isAuthorized()){
			$data = Model::factory('vc')->getData('news', $id , $vers);
		}else{
			$data = Model::factory('News')->getCachedItem($id);
			if(!empty($data) && !$data['published'])
				$data = array();
		}
	}

	$template = new Template();
	$template->page = $this->_page;

        if(empty($data))
        {
           $this->_page->text .= $template->render($this->_page->getTemplatePath('notFound.php'));
           return;
        }

       $this->_page->page_title = $data['title'];
       $this->_page->html_title = $data['title'];
       $template->data = $data;
       // Render the news item template in the field ‘Page object text’
       $this->_page->text.=$template->render($this->_page->getTemplatePath('news_item.php')); }
  }
}
To activate the controller, add record on it in the ‘Frontend Modules’ section, define its unique code (e.g. news), select the controller, enter the menu title and click Save.
Now, the controller may be set for working with pages. Go to the Pages section of the administrative interface, create News page and sets its handler to our controller:
Lastly, publish the page (the ‘Publish’ button) and create templates for displaying the list and the news page:
/www/templates/public/news_list.php
<?php
$list = $this->get('list');
if(is_array($list) && !empty($list))
{
    $pageUrl = $this->get('router')->findUrl('news');
    foreach($list as $item)
    {
        $url = Request::url(array($pageUrl , 'item', $item['id']));
        ?>
        <div class="news_list_item">
            <b><?php echo date('Y.m.d' , strtotime($item['news_date']));?></b>
            <a href="<?php echo $url ?>" class="news_list_item_header"><?php echo htmlspecialchars($item['title']); ?></a>
        </div>
        <div class="sep"></div>
        <?php
    }

    $pager = $this->get('pager');
    if($pager)
        echo $pager;
}
else
{
    echo '<h3>' . Lang::lang()->get('NO_RECORDS_TO_DISPLAY') . '</h3>';
}
/www/templates/public/news_item.php
<div class="news_item">
	<h4><?php echo date('d.m.Y' , strtotime($this->data['news_date']));?></h4>
        <?php echo $this->data['text']?>
</div>
That’s it, don’t forget to insert the link to the page in the eponymous section:
